Apple is the number one brand that makes exceptional laptops/computers and mobiles with the latest technology. The Apple Macs are generally reliable and you can rely on them to do your official and personal work. Sometimes you might face problems even with the new machines so not to worry as you can reset your iMac at home only. The factory reset is quite simple and does not require advanced skills because it is only a matter of a few minutes.
There are lots of benefits of doing factory reset because by doing so your system becomes just as new as the old junk data and files get completely wiped out and you can again reinstall the new version on your Apple iMac.
It is also the best way to make your old computer to work like new by using the latest configuration and not just this you can also upgrade the RAM size and other parts to install heavy programs and features.
How To Reset, Change Password and Restrict Devices on your JioFibre Broadband
The simple steps of doing a factory reset of you Apple iMac are
Step 1: You have to, first of all, restart the computer and it can be done by directly pressing the power button until and unless you start seeing the dialogue box that asks you choose the restart option. The other way of restarting the computer is by selecting the Apple icon which is available in the top right corner of the screen and choosing the restart option.
The third way of restarting the Apple iMac is by using a simple command of Control + Command Eject buttons in case the iMac is frozen.
Step 2: Once you successfully restart the computer, wait for it to turn off, then press the command plus R button and wait till the Apple logo appears. After the logo appears you will just have to release the keys and let the Apple iMac boot up. Generally, it takes only a few seconds to load but if it does happen for some time then be patient.
After the above steps are complete you will see that it will not open as normal but it will boot into recovery mode. Now, it’s time to select your user profile and enter the password before accessing the content.
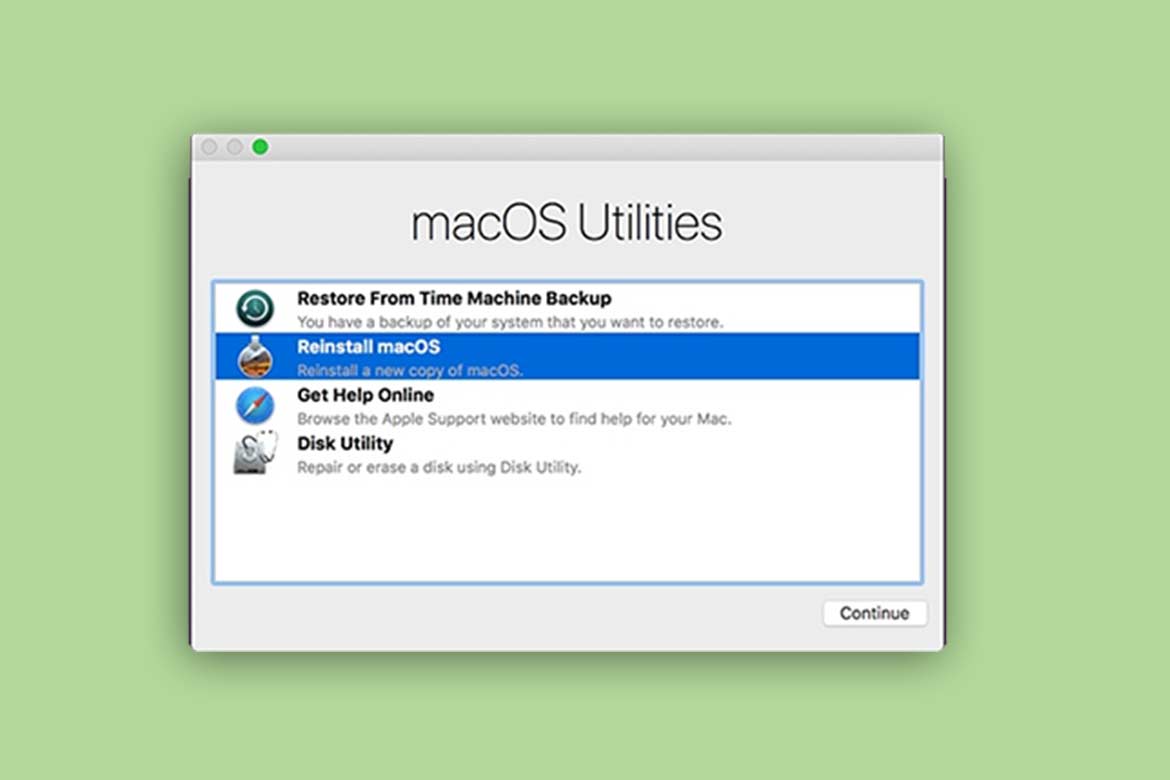
Here you will get the option to restore the settings by entering the time and taking backup. Once the backup is taken you just have to copy the new Mac operating system and use the information to access, repair a damaged disk and erase the data. It depends on you whether you are interested in erasing the whole data or want to do the repairing of the damaged disk.
In case you are interested in erasing everything and want to start everything from scratch than in this case select the disk utility space which can be seen under start-up heading.
Step 3: Erase the complete data
To completely erase the data of your iMac, click on the startup disk and use the erase option that can be seen on the top of the disk utility window. A dialogue box will open, now change the Mac operating system format and click on the erase button. Following these steps will completely erase everything. You can now go to the disk utility menu that can be seen on the upper left corner of the screen then choose the quick disk utility option.
But you should be aware that once the above steps are followed there is no way going back as you will no longer be able to get the erased data back. Hence, it is strongly advisable that you take backup or sync the data on cloud storage so that it can be used later.
Step 4: Once you have erased the data it is time to reinstall the Mac operating system on your Apple iMac.
To reinstall the Mac operating system go to the utility screen then click on the reinstall MacOS and keep following the instructions. In case you want to use any other version of the MacOS then you can skip these steps.
Furthermore, you can also save your files by using the Time Machine backup and easily restore the old files by clicking on the “Restore from Time Machine Backup” option.
How To Send Money By Using WhatsApp Pay?


